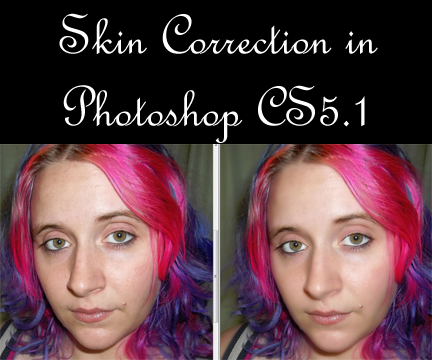
Now I used Photoshop CS5.1 for this tutorial, however it may easily work with other versions of Photoshop. This is for minor corrections and now things like heavy blemishes or anything like that. This just smooths the skin a bit more and gives more of an ‘airbrushed’ type look I guess you could say.
All images can be clicked to see them bigger if that helps you out. ^_^
By the way, before correcting my skin I used the Spot Healing Brush Tool to cover up the blemish under my nose. It’s the little bandaid looking thing right next to the brush tool on the pallet!
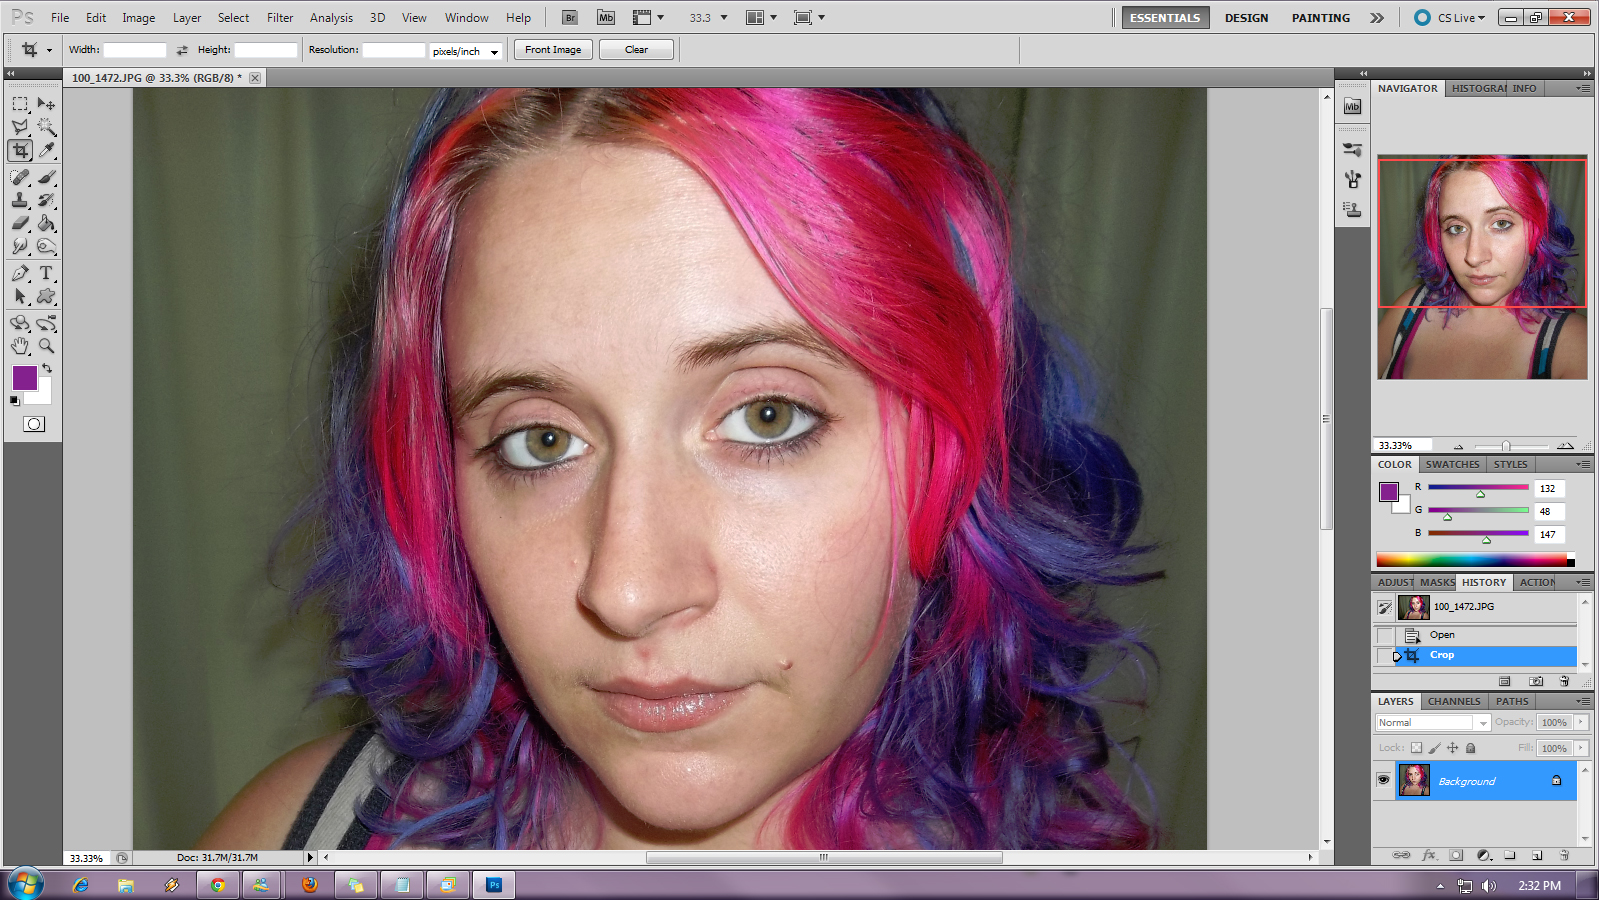 Step 1: Start with the image you want to edit.
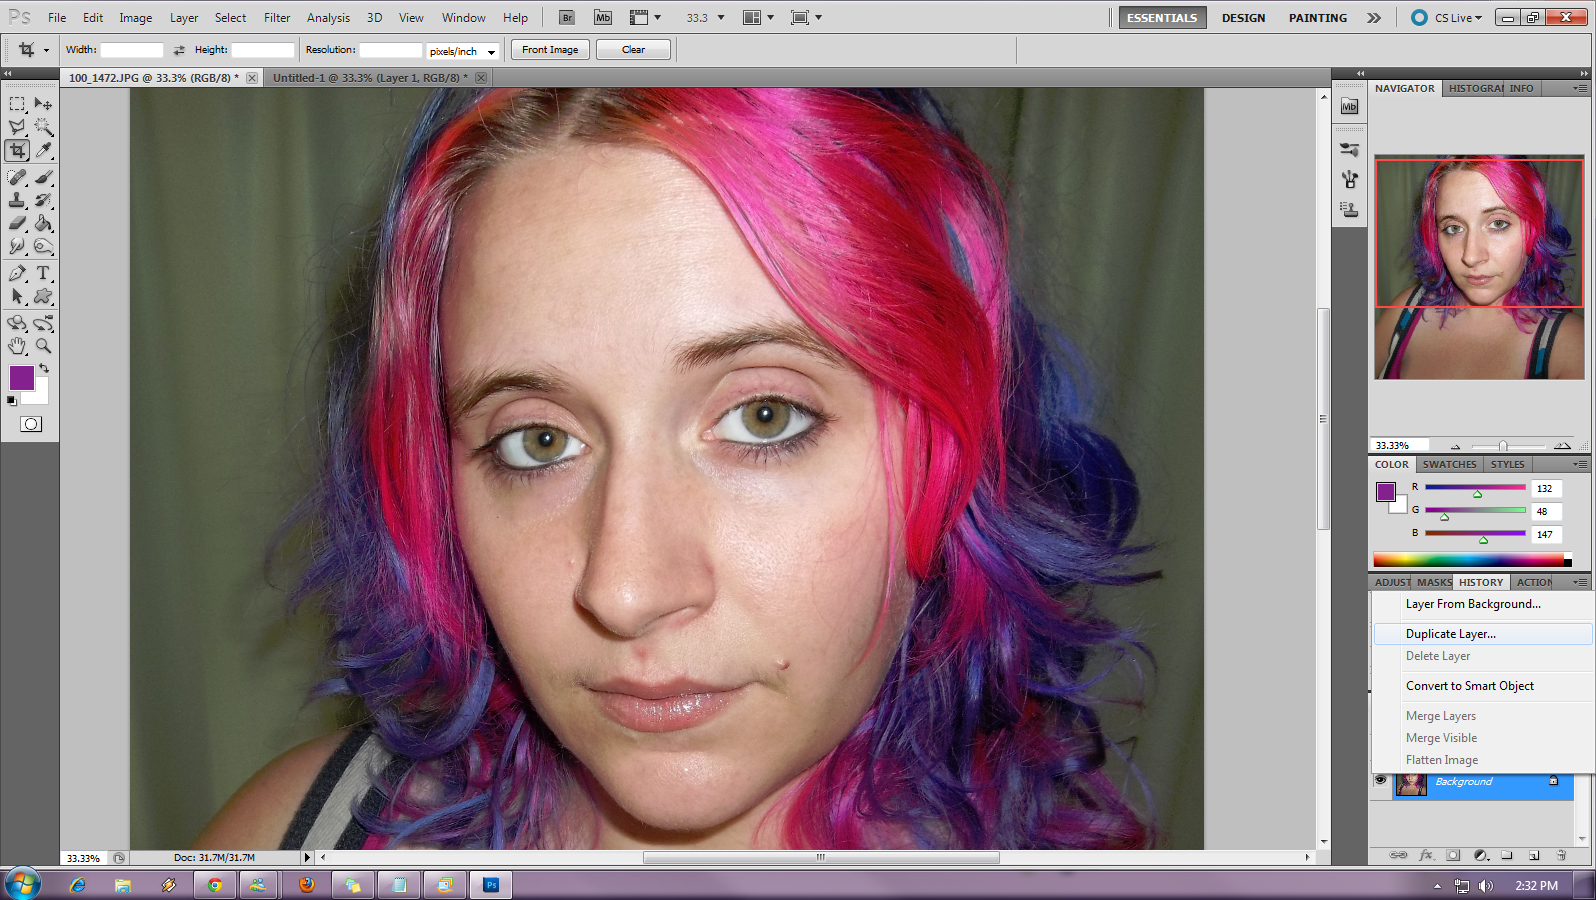 Step 2: Duplicate your background layer by right clicking on it over in the layers section, and hitting duplicate layer.
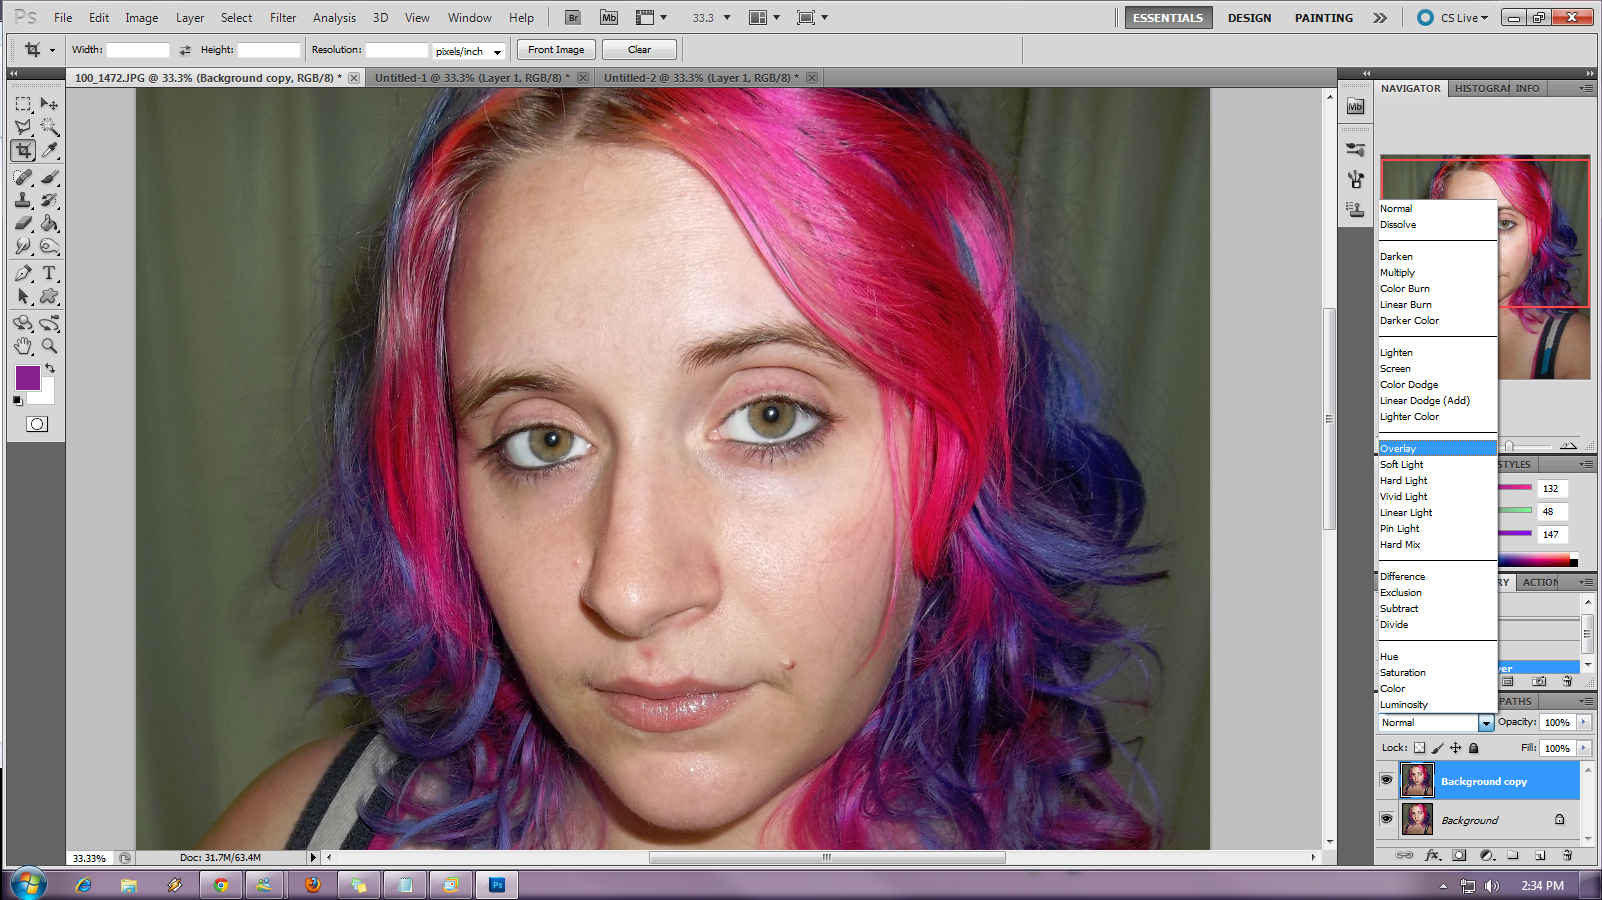 Step 3: Change the blending mode of your new layer (make sure you click it to select it!) to Duplicate.
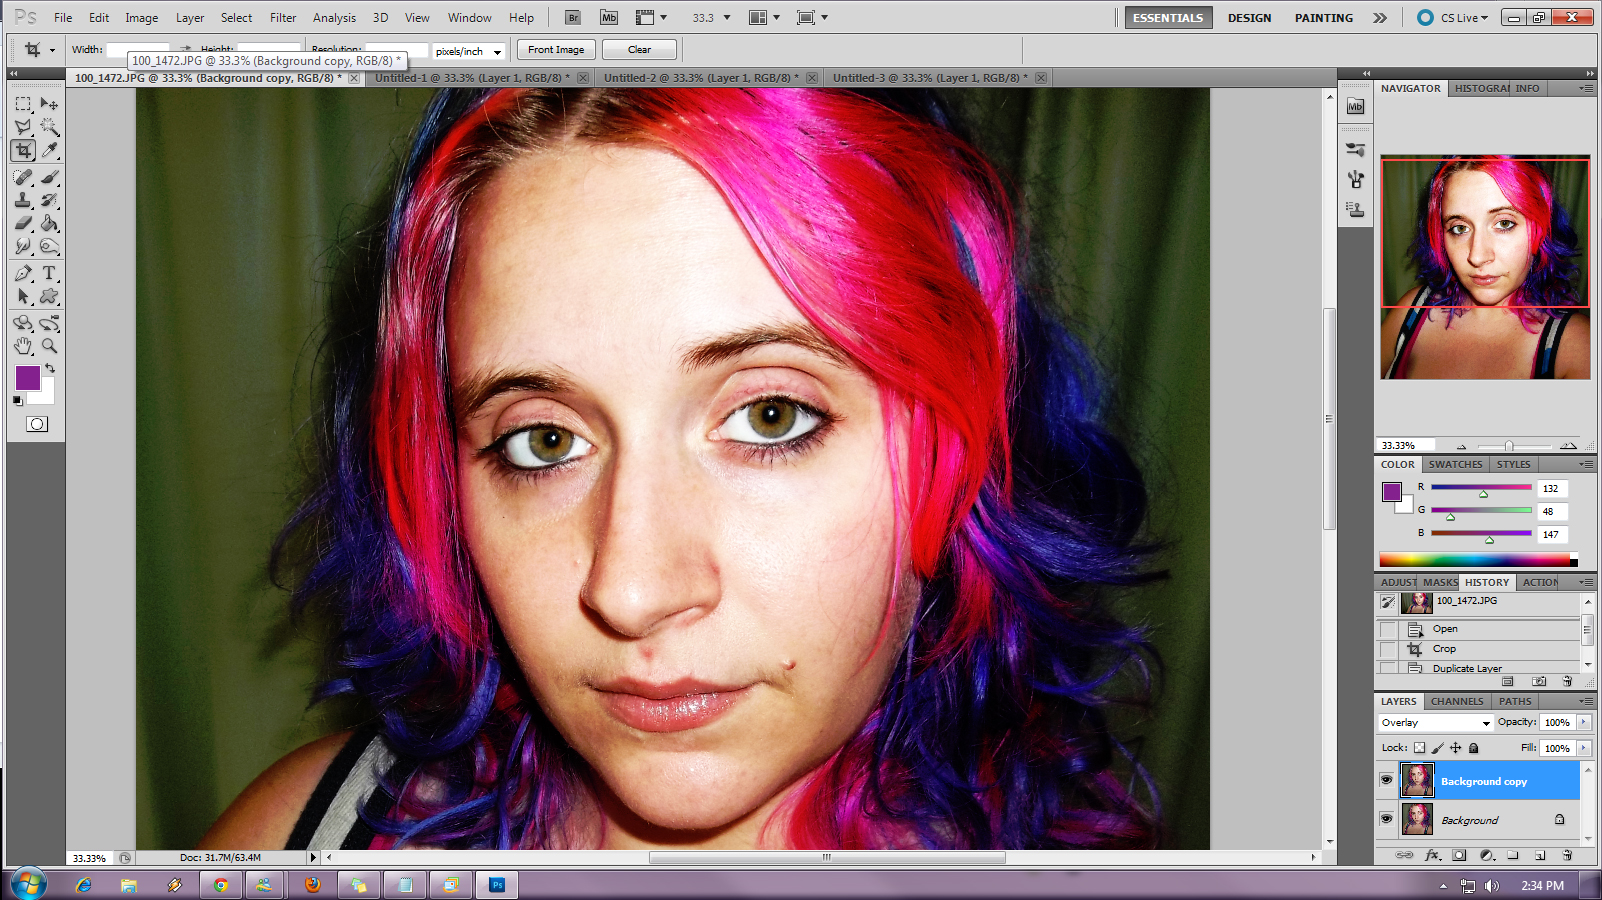 Your image should look different now, a bit like mine does to the left here. Don’t worry, this is what you want to have happen! ^_^
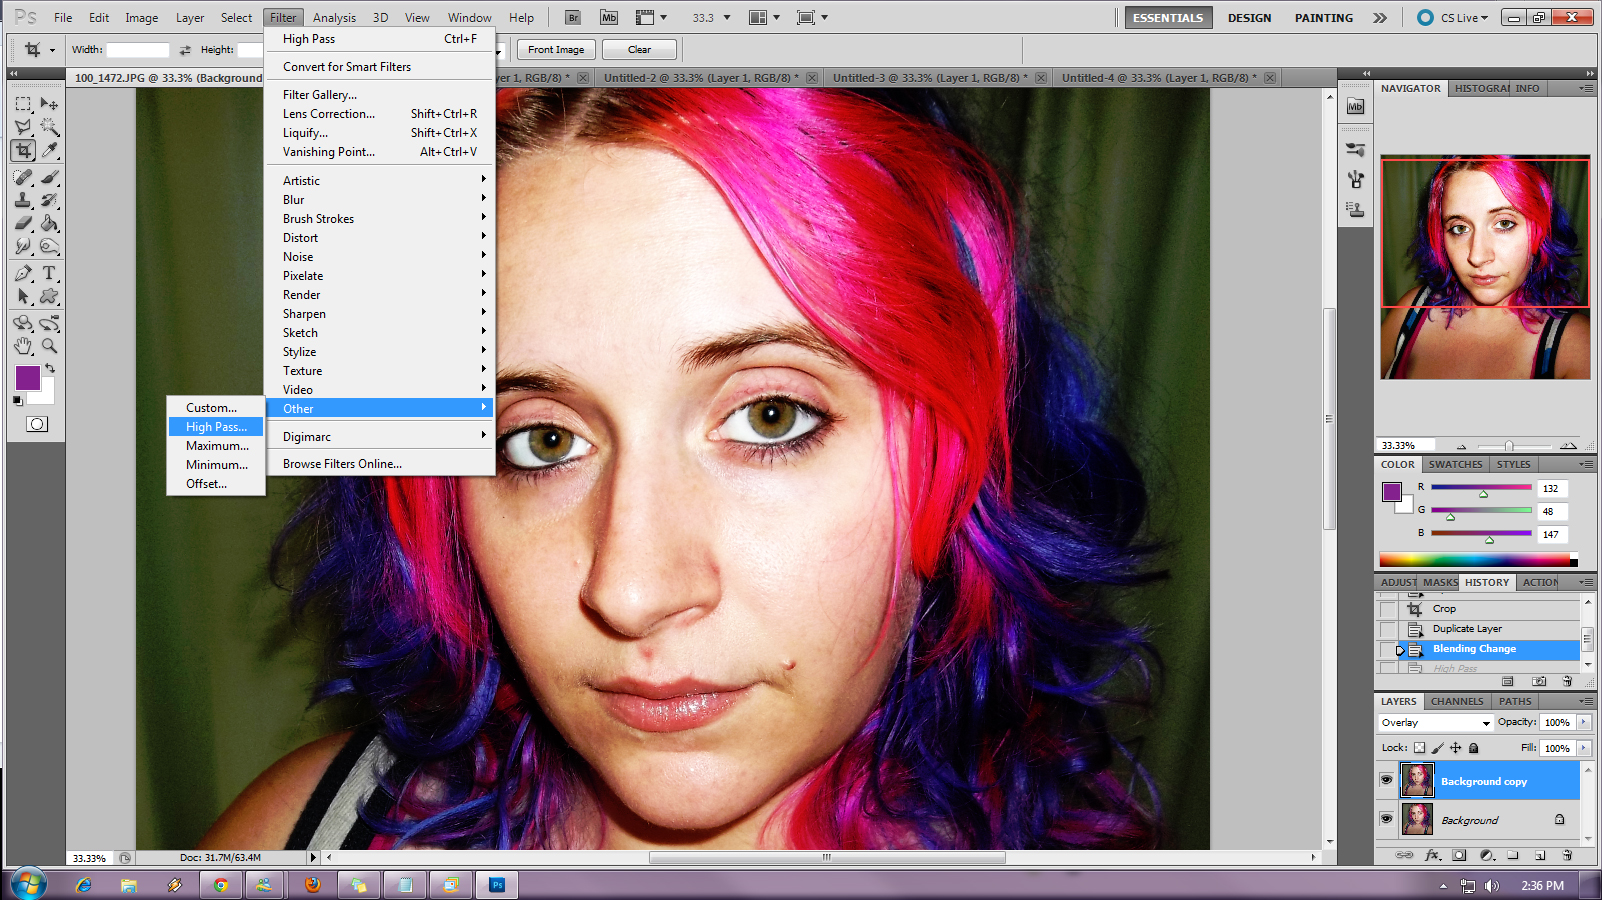 Step 4: Click filter, go down to other, and select “High Pass”
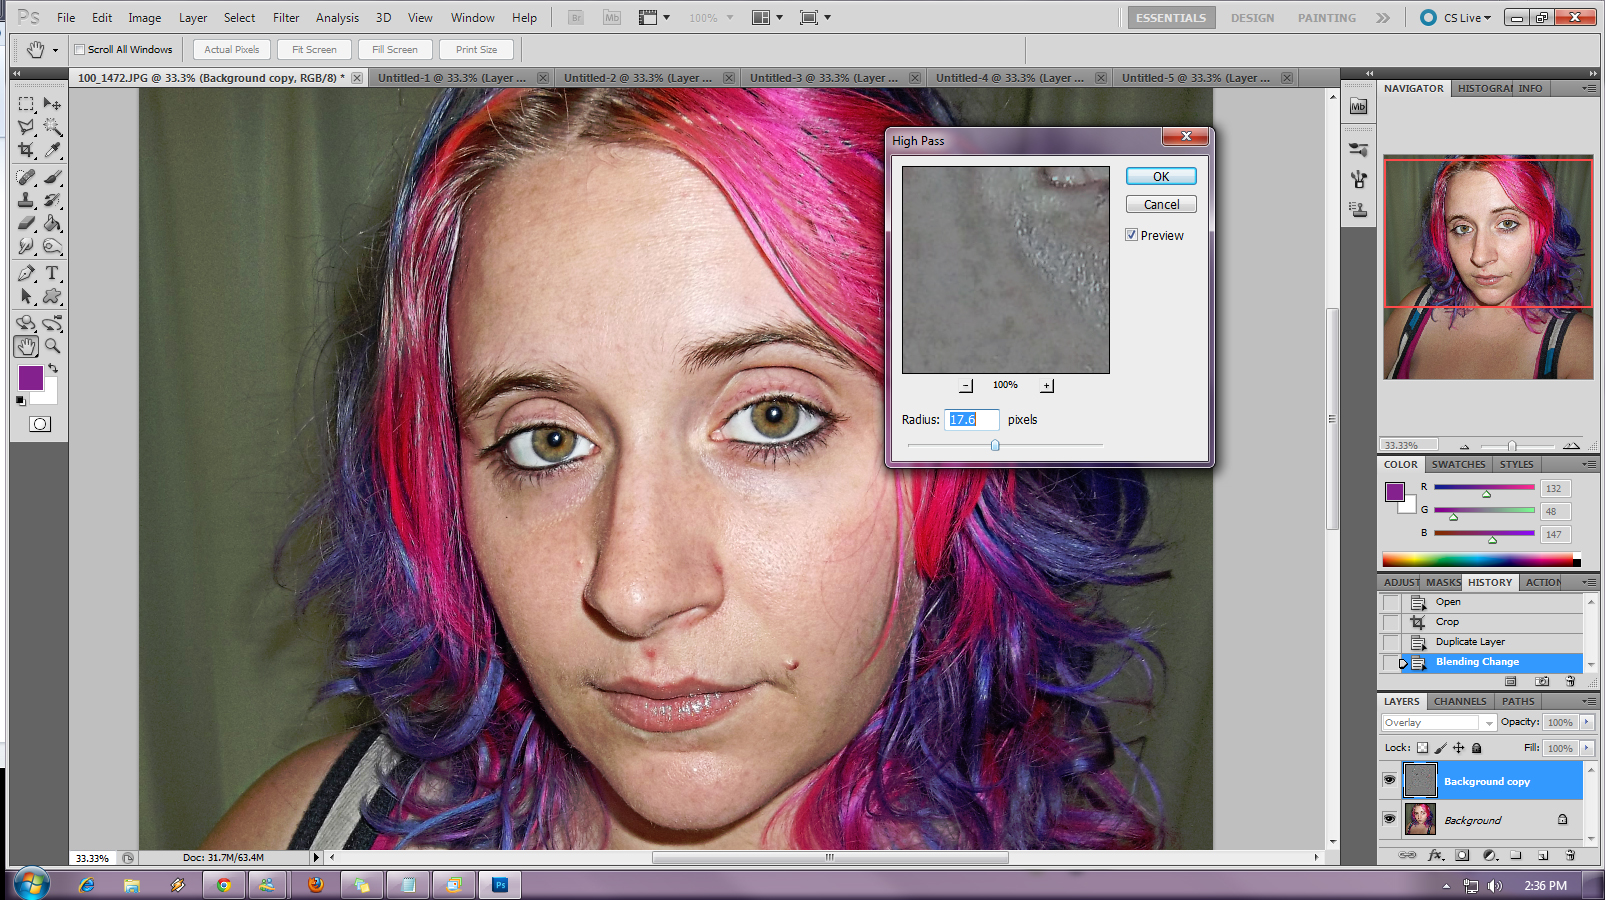 Step 5: Change your radius to be someplace within 13 and 20, or more depending on the DPI of your image. This is all based on watching how things look as you adjust the radius and going with what looks best to you.
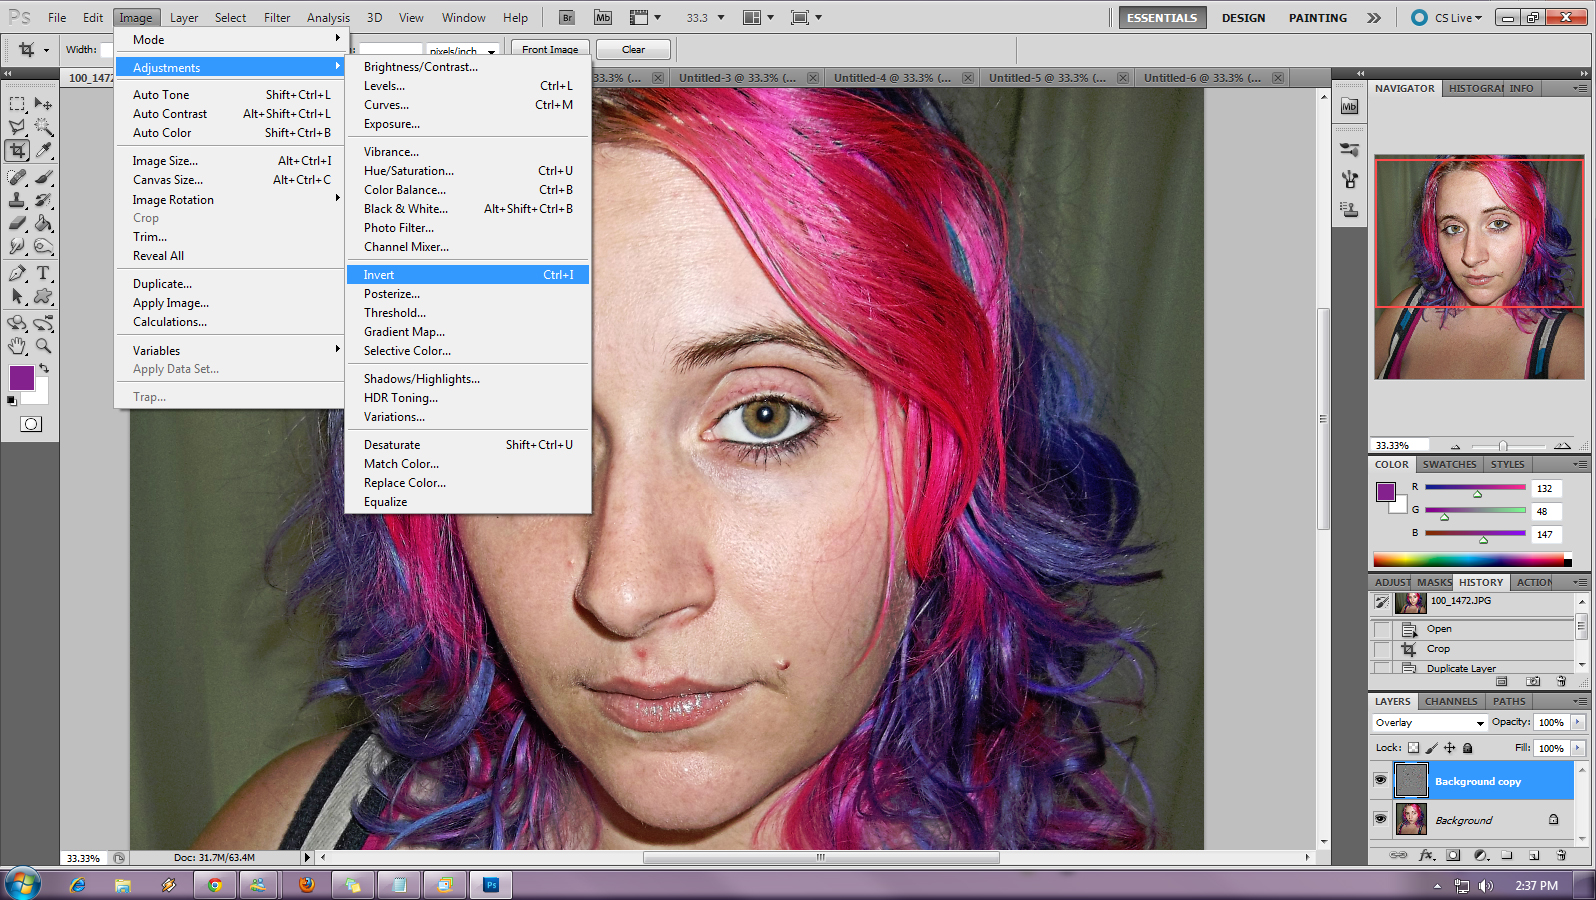 Step 6: Click Image, Go to Adjustments, and select Invert. Or to make it easy just press Control and I!
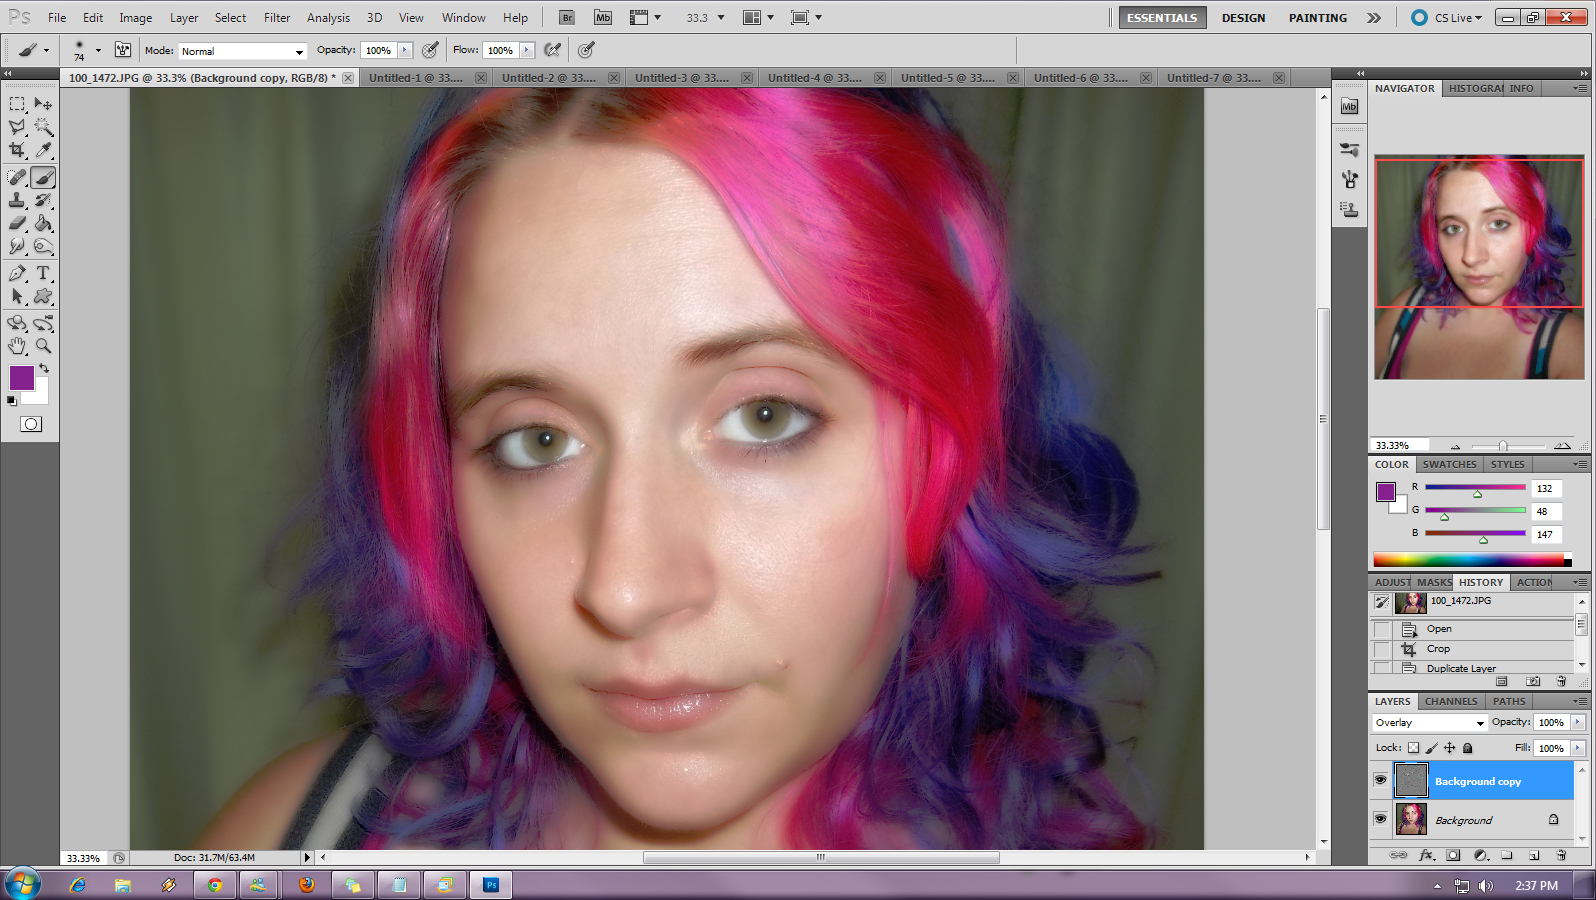 Your image should look all blurry and similar to this now. Oooohhhh~!
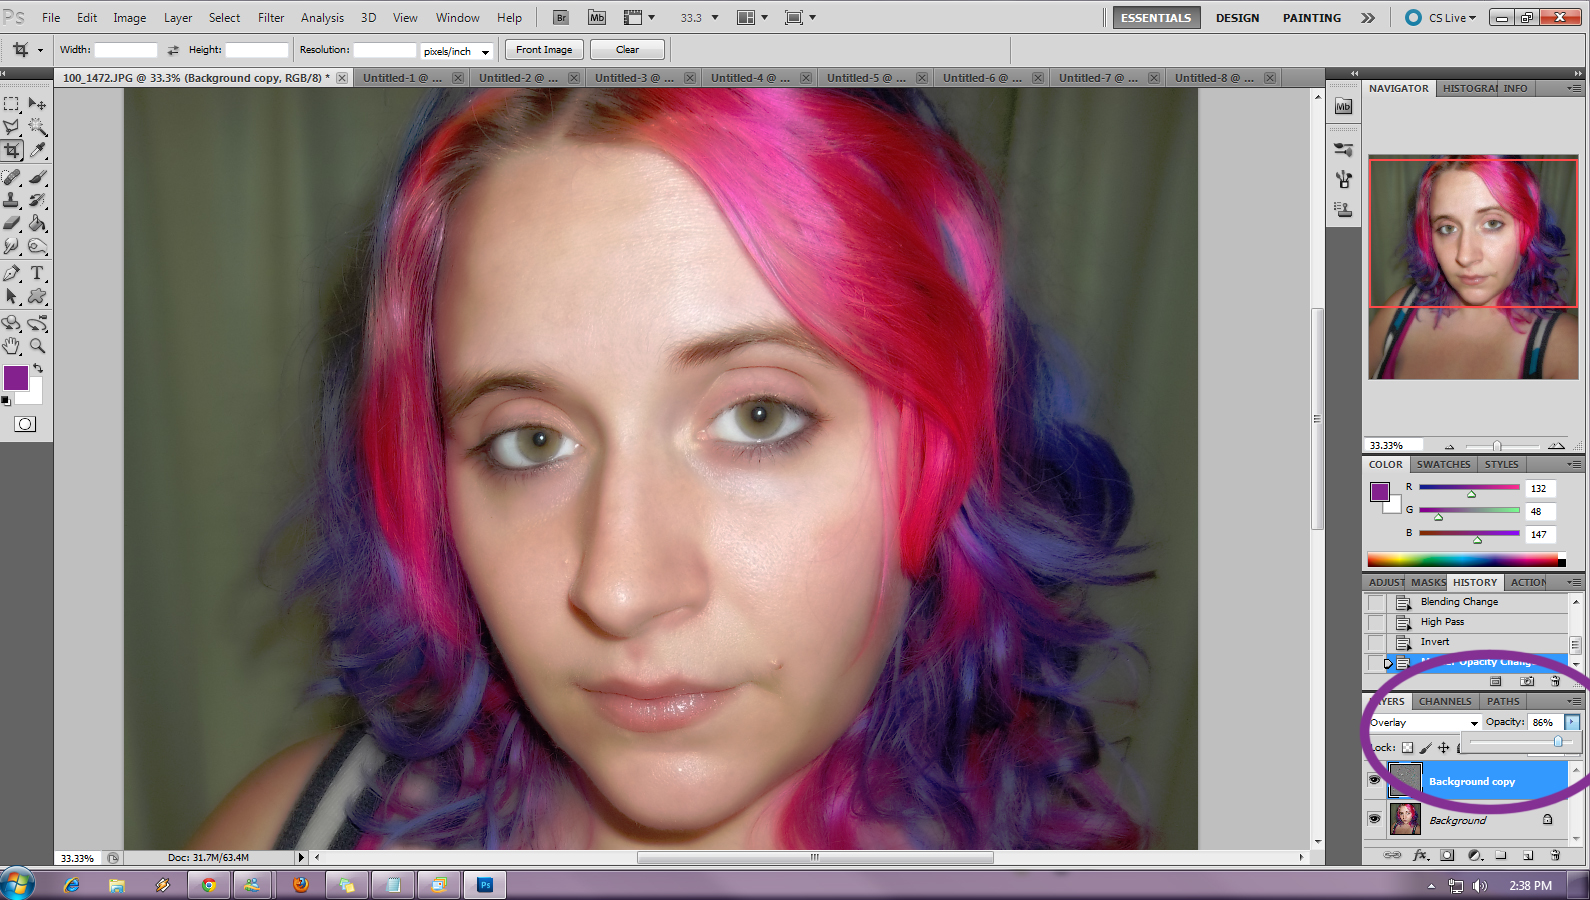 Step 7: Change your opacity up! You can change this as much or as little as you want to suit how you want the skin to look. I did 86% opacity here for this working layer.
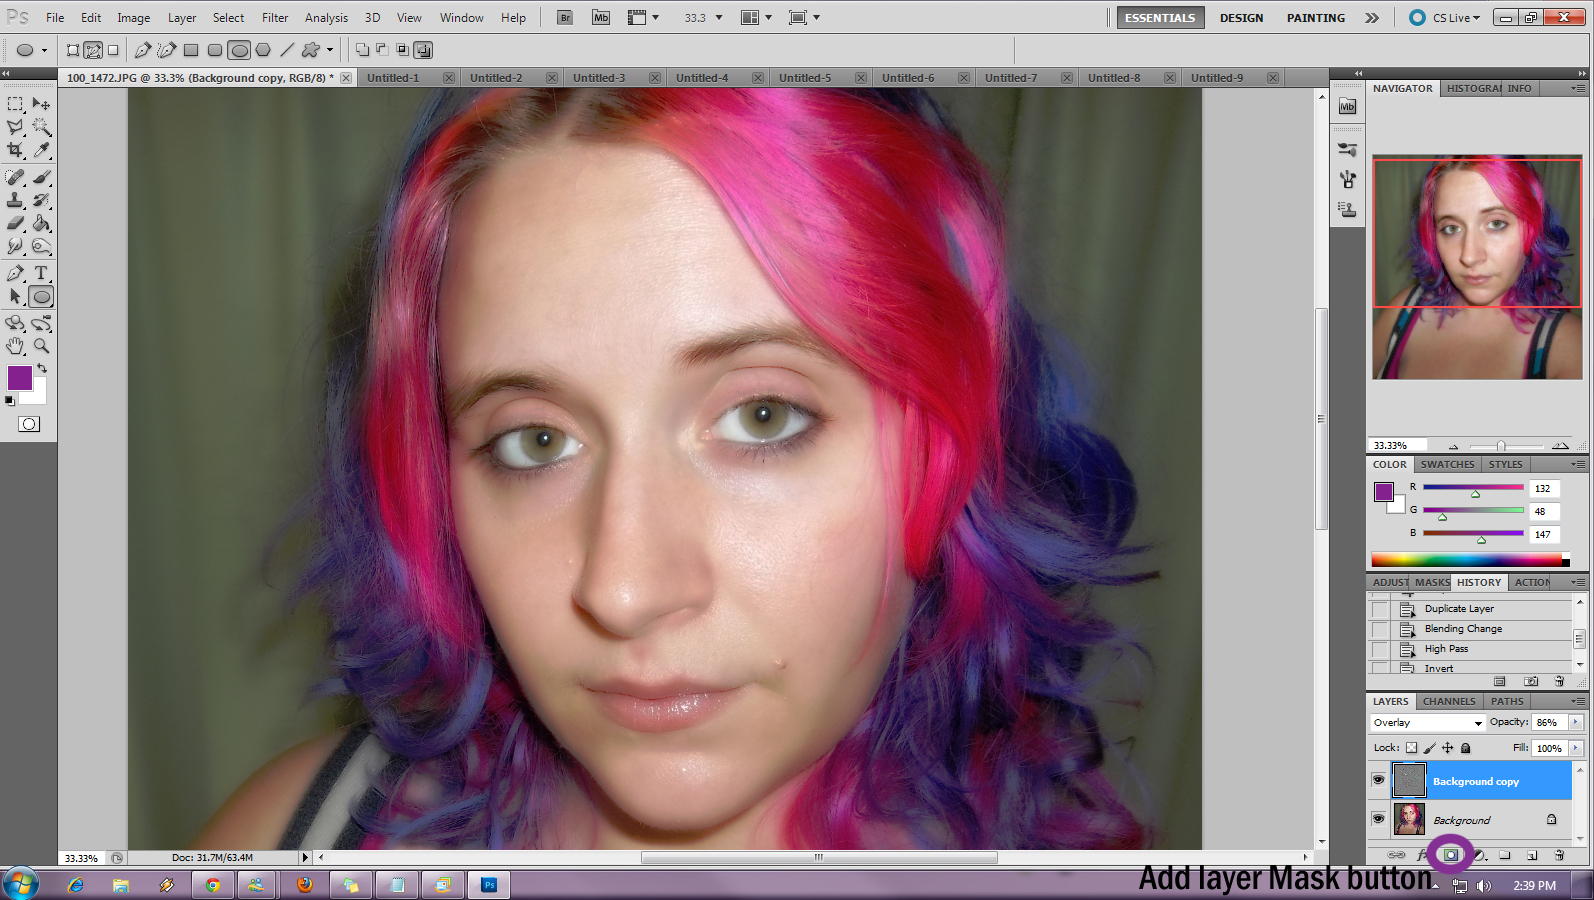 Step 8: Click the Add Layer Mask button down in the right hand corner, I’ve gone ahead and circled it in purple for you so you can see what it looks like.
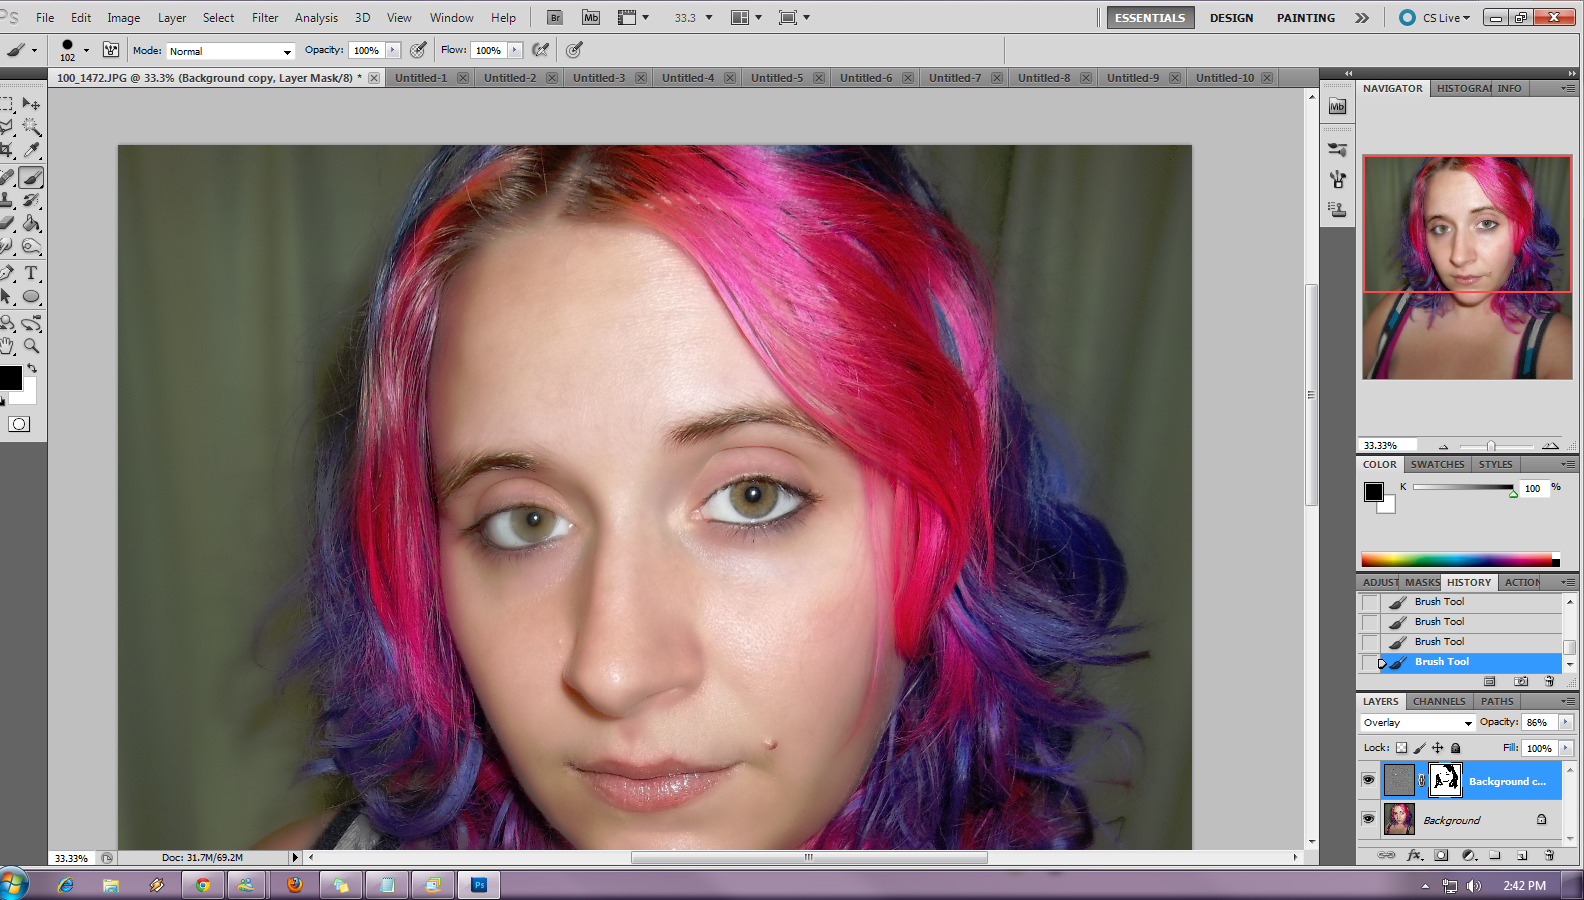 Step 9: Make sure to click on your new layer mask and then use your brush on black to ‘paint’ over the areas you don’t want made smoother. So for this it’d be my shirt, my hair, eyes, things like that. In this picture I’ve only painted over one of my eyes, so as you can see one is blurry and the other is not.
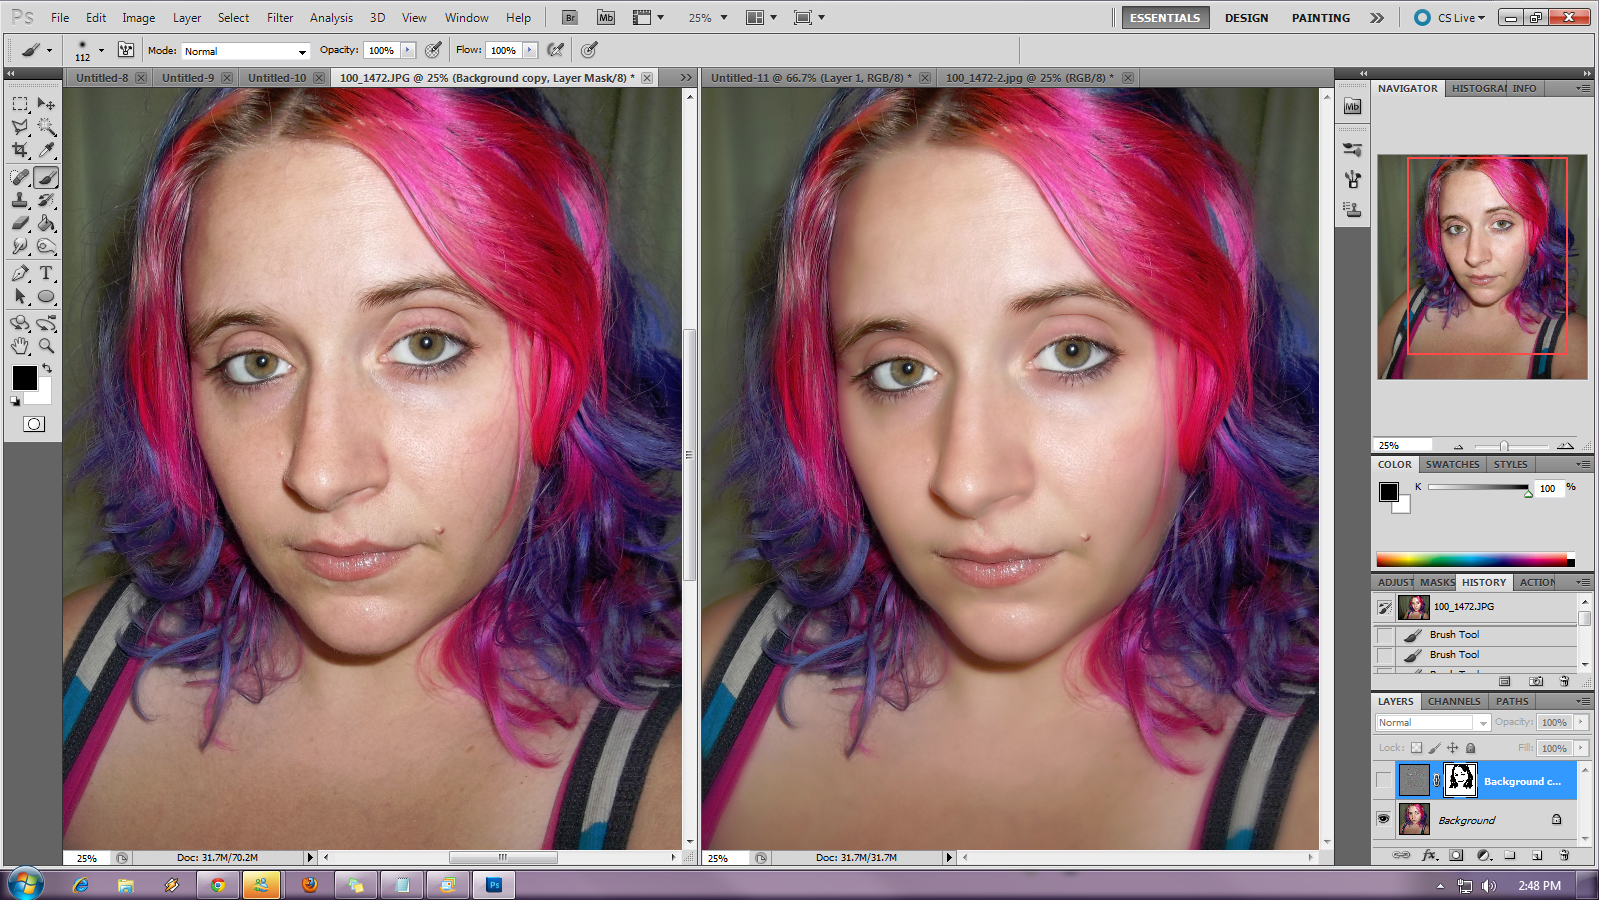 Voila! You’ve done it! As you can see here this is the difference between my image originally, and the edits I did to the skin. What a difference just a little Photoshop can make!


Nice tutorial about the photoshop. i love using the photoshop back when i was in my university. I guess i need to brush up my skill now
Thanks for this tip. I just got photoshop and I’m lost, this has helped me greatly.
Thanks for the tutorial!!! my skin looks red in the winter
Great “step-by-step” instructions for Photoshop flaw coverages. As I am an avid “family gatherings” photographer, this tool would definitely come in handy when presenting these photos. Thanks for the share!
I am lost when it comes to Photoshop so thanks for the tips. I’ll be sure to try it out sometime.
Thank you for the great tutorial. I have been using PhotoShop for many years but I find that there is always more that can be learned about the software.
I so needed this! Keep the photoshop tutorials coming!